
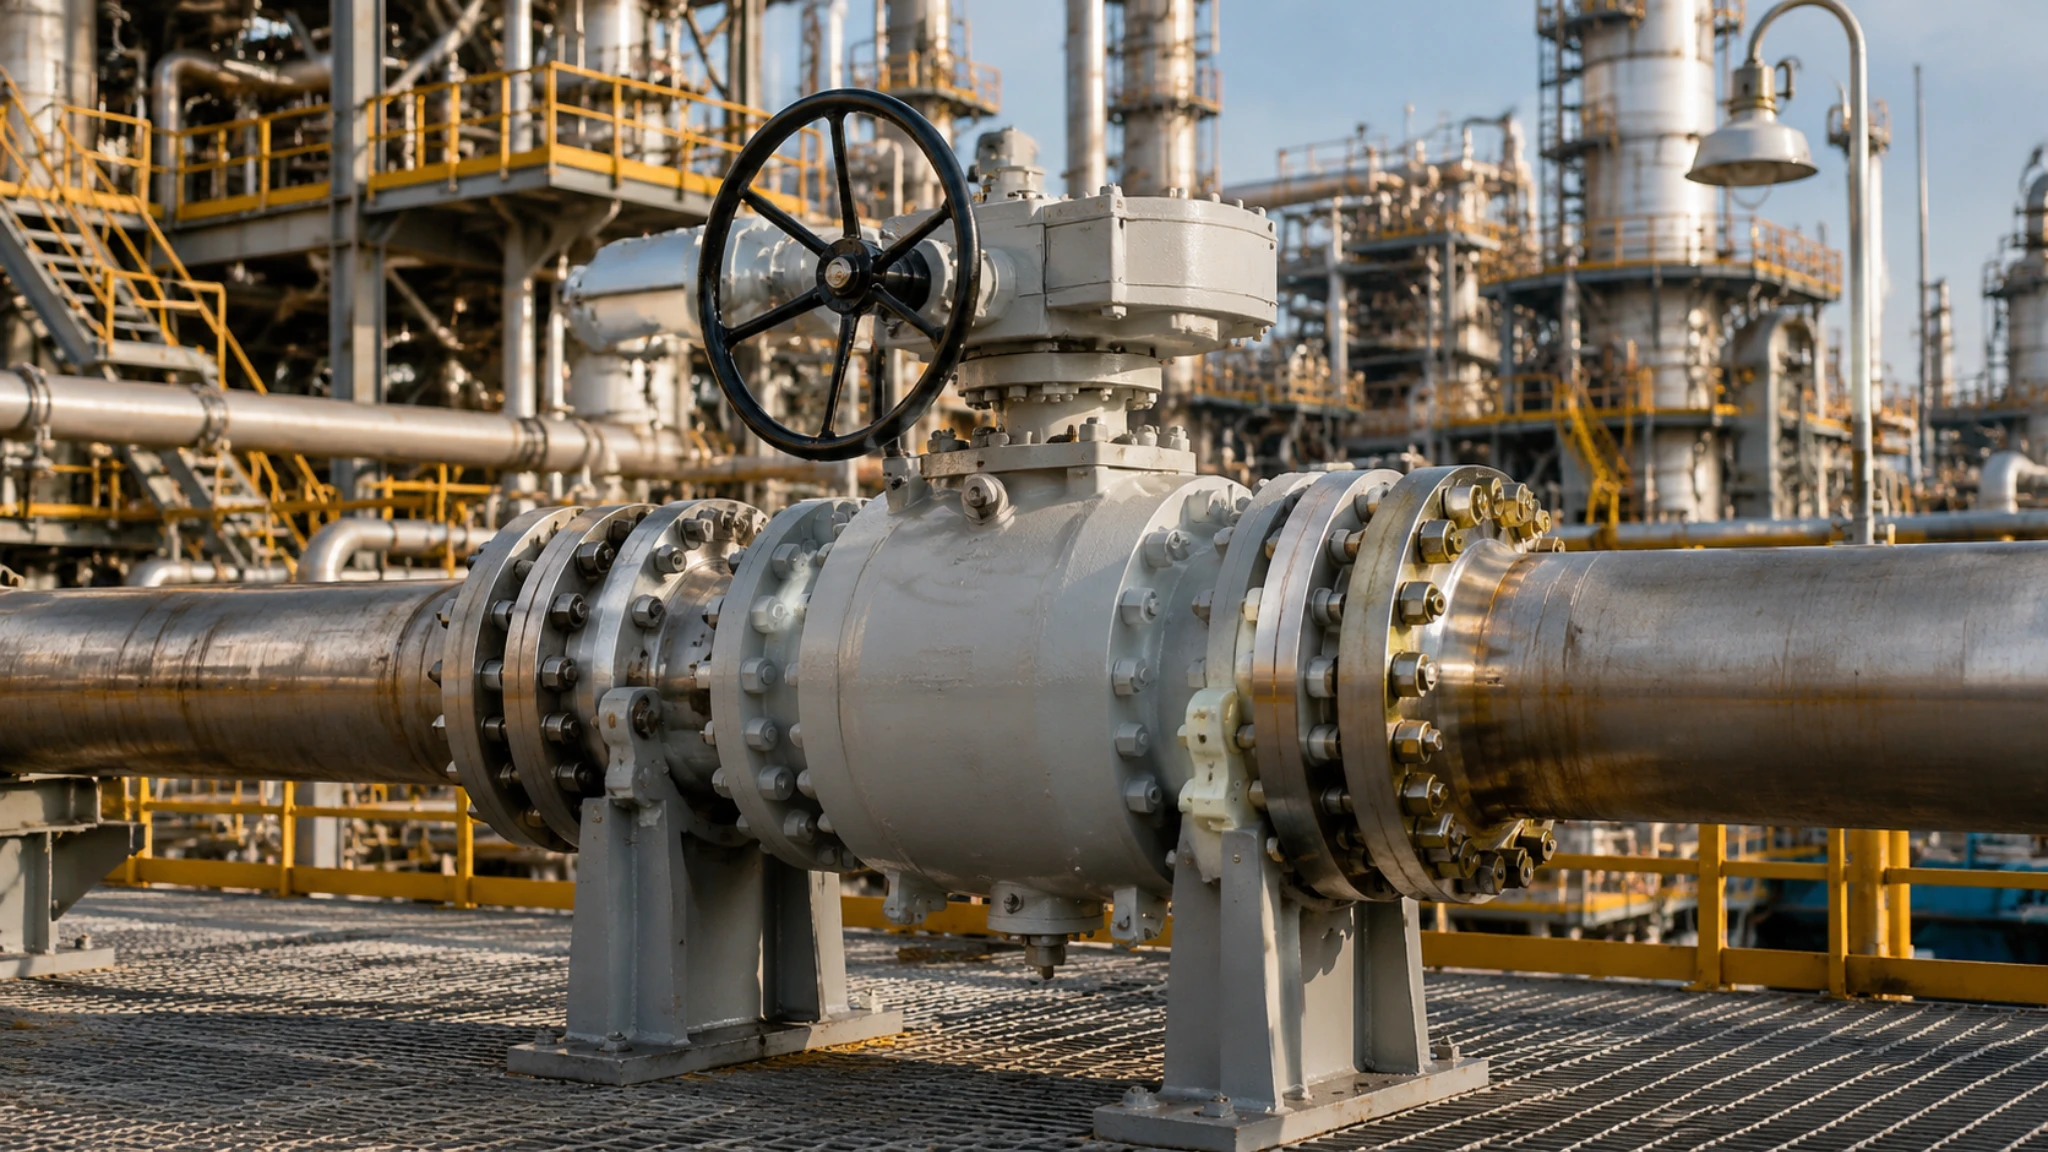
According to FCI (Fluids Control Institute), 34% of ball valve failures stem from improper installation or maintenance rather than manufacturing defects. I once saw a NPS 12 ball valve at a natural gas processing plant develop body flange leakage due to uneven bolt preload — we replaced the gasket and restored operation within 2 hours. Had that leak gone unaddressed, the pipeline would likely have been forced offline within 72 hours.
Fix Common Issues
Stop Internal Leaks
Seal face wear on the ball and seat rings accounts for roughly 55% of all internal leakage cases in API 6D ball valves. API 598 mandates a seat sealing test at 1.1x rated pressure, held for 30 seconds — leaks detected below this pressure typically originate from scratches or indentations on the sealing surfaces, not from body structural integrity. I once inserted a borescope through the drain port on a leaking valve and found an 8 mm long through-type scratch on the ball surface, approximately 0.3 mm deep, caused by a small solid particle embedding itself during a closing cycle.
The diagnostic sequence for seat leakage: first, apply soap solution externally to confirm actual leakage (sometimes the upstream flange is the source); second, check the DBB bleed port — if present — to determine whether the upstream or downstream seat is leaking; third, inspect internally after depressurizing the valve body cavity. Blindly disassembling the valve wastes time and may lead to misdiagnosis — I once encountered a case where the actual leak originated from a weld seam on the valve body side, completely different from where we had focused our inspection efforts.
PTFE soft seat wear manifests as bright, polished surfaces with cold-flow marks; Stellite metal seat wear shows as widened sealing lines, pitting, or surface spalling. When a PTFE seat wears, the spring preload force can compensate — springs are typically set between 0.5 and 2.0 N·m — but when spring force drops more than 25%, the seat ring must be replaced outright.
- Seat leak diagnosis: DBB bleed port identifies upstream vs. downstream seat; borescope confirms seating face condition; soap solution externally validates
- Sealing face scratches: Replace seat if depth exceeds 0.5 mm; repair by lapping if depth is 0.2 to 0.5 mm
- PTFE seat wear: Bright, polished surface with cold-flow marks; replace if spring preload drops more than 25%
- Metal seat wear: Sealing line widened 3 mm or more; pitting or spalling present — lap or replace
- Leak rate standard: API 598 requires zero visible leakage; bubble test with nitrogen at 0.4 MPa, hold 1 minute
- Seat replacement: Clean seat groove thoroughly; no residual old sealing material; verify preload after pressing in new seat
Eight ball valves at an ethylene cracking unit simultaneously developed internal leaks, and the vendor engineer diagnosed a batch quality problem requiring full replacement. I inspected the site and found operating temperatures on those valves regularly exceeded the PTFE seat limit of 200°C — actual temperatures reached 215°C. The root cause was high-temperature creep of the PTFE seats, not material defects; installing new PTFE seats would have produced the same failure. After replacing all seats with glass-fiber-filled RTFE (rated to 230°C), the valves ran without issue for two years. Identifying the correct root cause solves the problem; misdiagnosing it wastes resources regardless of how many parts you replace.
Fix Stem Leaks
Approximately 18% of all external ball valve leaks originate from stem packing failure — the stem packing stuffbox bears full cavity pressure and permits stem rotation or axial movement, making it the most common maintainable failure mode. I once encountered a Class 600 ball valve with a slow stem drip; a torque wrench test revealed the gland was loose — simply tightening the gland nuts to 45 N·m stopped the leak entirely, without spending a single dollar on parts. This case illustrates that stem leakage does not automatically require packing replacement — always check for looseness first.
The standard stuffbox structure from inside out: stem → PTFE/graphite packing rings (typically 2 to 3 rings) → gland → gland nuts. Three primary causes of packing failure: gland loosening (most common, approximately 50% of packing leaks), packing aging (30%), and stem surface scratches (20%). Aged packing typically presents as persistent leakage that briefly responds to gland tightening before recurring.
Graphite packing (flexible graphite) handles high-temperature service far better than PTFE — graphite ratings extend to 450°C while PTFE begins degrading above 200°C. However, graphite packing demands higher stem surface finish — if stem surface roughness exceeds Ra 0.8 μm, graphite packing wear rate accelerates 3 to 4 times above normal. My standard practice before replacing any packing is to lightly polish the stem surface with 1000-grit sandpaper (Ra 0.8 μm or better) before installing fresh packing.
- Packing leak diagnosis: Check gland looseness first (torque wrench); then check packing aging; finally inspect stem for scratches
- Gland torque: A216 WCB body Class 300-600 typical torque 35 to 55 N·m (verify against manufacturer data sheet)
- Packing material: Graphite (high temperature to 450°C) vs. PTFE (low temperature to 200°C); graphite requires Ra stem finish 0.8 μm or better
- Stem scratches: Replace or precision-lap if depth exceeds 0.2 mm; magnetic particle inspection detects microcracks
- Packing replacement: Remove old packing; inspect stem surface; stagger new ring cuts 120 degrees; pre-load gland to specified torque
- Graphite packing installation: Never use metal tools to drive in; use wooden or plastic hammer for uniform seating; prevent breakage
API 6D requires body-to-stem continuity resistance not to exceed 10 Ω (anti-static). During every stuffbox maintenance job, I measure this — once I found 38 Ω, well above the 10 Ω limit, caused by a broken graphite ring inside the stuffbox disrupting electrical contact. After packing replacement, re-measurement returned to 4 Ω. Anti-static non-compliance is not merely a sealing issue in high-pressure flammable service; it is a direct HSE hazard.
Unstick Stuck Valves
45% of all valve seizure cases stem from particle jamming — ball valve seizure (inability to rotate) ranks among the most frustrating on-site problems, and improper handling can damage ball seating faces or seat ring geometry. I once handled a case where an NPS 8 ball valve on an offshore platform failed to reopen after completing an isolation mission. The field crew tried using an extended lever to force rotation, which stripped the stem threads entirely — the valve was then a total loss. This example illustrates a critical rule: never force a stuck valve without first diagnosing the cause.
Three primary seizure causes: particle jamming (45% of cases), thermal deformation binding (30%), and stem or gearbox corrosion (25%). Diagnostic sequence: first, gently tap the valve body side with a rubber mallet in the reverse direction; if ineffective, detach the actuator and attempt manual operation via the handwheel — normal handwheel operating force should not exceed 300 N·m; if it does, the binding is internal to the valve body, not in the actuator. Never use extended levers or strike the stem — this damages threads and the blowout-proof structure.
For particle jamming, keep the valve in fully open position and slowly inject flushing oil (diesel or proprietary valve flushing fluid) from the upstream side while repeatedly and gently tapping the valve body, allowing particles to dislodge and flush out with the flow. If flushing fails, the valve must be disassembled for inspection — continuing to force operation on a jammed valve causes ball surface indentation. I have seen ball surface scratches 0.5 mm deep from forced operation that were not noticed at the time but caused sealing failure three months later.
- Seizure diagnosis: Attempt reverse tapping first; then disconnect actuator and test with handwheel; handwheel force greater than 300 N·m indicates internal binding
- Particle jamming (45%): Flush with flushing oil, tap repeatedly; drain debris through blowdown port
- Thermal binding (30%): Heat valve body (steam or hot water jacket); tap gently; never use torch to directly heat valve body
- Corrosion seizure (25%): Disassemble gearbox for rust removal; apply anti-rust compound to stem; replace stem if severe
- Prohibited actions: Never use extended levers; never strike the stem; never force operation before identifying cause
- Stem thread inspection: Inspect threads for wear or deformation after disassembly; damaged threads require stem assembly replacement
A crude oil distillation unit at a refinery experienced recurring ball valve seizures every few months. I recommended installing Y-strainers upstream of the valve cluster, intercepting particles before they enter the valve bodies rather than accumulating inside. This modification cost approximately $8000 per unit; two years later, the seizure incidents stopped entirely. Until the root cause of recurring seizure is actually eliminated, no amount of valve replacement will prevent the problem from returning.
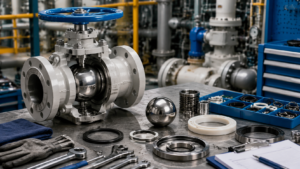
Essential Spare Parts
O-Rings and Seals
Each ball valve contains 3 to 8 O-rings, located in the stem stuffbox, bonnet seal, DBB bleed port, and other sealing locations. Common O-ring elastomers include Viton (fluorocarbon, oil-resistant and high-temperature-capable) and NBR (nitrile, oil-resistant and economical). I recommend maintaining 2 complete sets of O-ring spares per valve, selected by body material: A216 WCB carbon steel bodies use NBR or Viton; A351 CF8M stainless bodies require full Viton (chlorides degrade NBR in offshore environments).
O-ring failure patterns: NBR in mineral oil above 70°C hardens approximately 8% per year, with significant loss of elasticity after 2 to 3 years of service; Viton loses elasticity above 200°C and becomes completely ineffective above 300°C. During an overhaul on a ball valve that had operated for 5 years, I found the bonnet O-ring had hardened into fragments — fortunately the bonnet sealing faces were undamaged. O-rings are rubber components; regardless of whether they are leaking, they must be replaced at end-of-life (typically 5 years), not after failure.
Flange gaskets are also essential spares: RF flanges use Spiral Wound gaskets (stainless steel winding with graphite or PTFE filler); RTJ flanges use R-type ring gaskets (oval R or octagonal RX). API 6D ball valve flange gaskets require specific compression targets per ASME B16.20: compressed thickness typically 75% to 85% of original thickness — insufficient compression causes leakage, excessive compression causes extrusion damage.
- O-ring count: 3 to 8 per valve, distributed across stuffbox, bonnet, DBB bleed port
- NBR O-rings: Oil and fuel resistant; temperature range -30°C to +120°C; hardens approximately 8% per year in mineral oil above 70°C
- Viton (fluorocarbon): Temperature range -20°C to +200°C; H₂S and selected acid/alkali resistant; approximately 3x the cost of NBR
- Replacement interval: Rubber O-rings recommended every 5 years; Viton in service above 200°C recommended every 3 years
- Storage: O-rings must be stored away from light, 5°C to 25°C ambient temperature, and isolated from ozone and solvents
- Flange gaskets: RF flanges use SS+graphite Spiral Wound; RTJ flanges use R-type ring gaskets
Flange gasket compressive force calculation: given bolt preload F (typically approximately 150 kN per bolt for DN 200 Class 300) and effective gasket sealing area A, the required gasket stress = F divided by A. When selecting gaskets, pay attention to the m-value (gasket factor) and y-value (minimum seating stress) defined in ASME VIII Division 1 Appendix — incorrect gasket selection is among the most common causes of flange leakage.
Seat Ring Kits
Keep at least 1 complete seat ring kit in stock for each valve model — the seat ring assembly (Seat Ring Kit) is the most critical sealing spare part in a ball valve, containing the seat ring, springs (for spring-preloaded designs), and the seat-to-body gasket. Spring preload force is the key to seat sealing: A216 WCB bodies commonly use 316 stainless steel springs set between 0.5 and 2.0 N·m — excessive preload accelerates seating face wear, while insufficient preload causes leakage at low differential pressure.
I recommend keeping at least 1 complete seat ring kit per batch of identical valves. When ordering, note that seat kits from the same manufacturer are not necessarily interchangeable across batches — even identical model numbers from different production years may exhibit dimensional variations of 0.1 to 0.3 mm. During maintenance, always measure the old seat ring precisely (inner diameter, outer diameter, height) and compare with the new unit before installation.
Seating face lapping: minor scratches (depth 0.2 to 0.5 mm) on seat rings can be repaired by lapping with 320 to 600 grit sandpaper and lapping compound, using circular motions following the ball curvature rather than linear strokes. After lapping, wipe clean with a lint-free cloth — never touch the seating face with bare hands, as skin oils leave hydrophilic residue that degrades sealing performance.
- Seat Kit contents: Seat ring, springs (316SS), seat-to-body gasket
- Spring preload: 0.5 to 2.0 N·m (adjustable), determining contact pressure between seat and ball
- Ordering note: Same manufacturer seat kits are not always interchangeable; new-old seat dimensional differences up to 0.1 to 0.3 mm possible
- Lapping repair: 320 to 600 grit sandpaper; replace if scratch depth exceeds 0.5 mm, do not lap
- Installation: Clean seat groove before pressing in new seat; never strike seat sealing face with metal tools
- Seat-to-body gasket: Material typically soft iron or 316 stainless steel; replace with new part at every overhaul
API 6D recommends seat ring replacement intervals: PTFE soft seats every 5 years or after 5000+ operating cycles (whichever comes first); metal seats every 8 to 10 years. Actual service conditions harsher than standard test conditions require proportionally shorter intervals. When reviewing equipment records, I frequently find many plants do not track operating cycle counts — this is a significant gap. Valves with excessive cycles should be proactively overhauled even without visible leakage, rather than waiting for failure to occur.
Packing and Gaskets
Stem packing (packing) is among the most frequently consumed spares. API 6D ball valves use three common packing types: PTFE V-ring packing (for Class 150-300, 150°C maximum), flexible graphite braided packing (for high temperature, 450°C maximum), and graphite-ring-plus-PTFE-ring combination packing (for mixed high-medium temperature service). Each packing type has recommended brands and specifications — I never recommend substituting low-cost alternatives. A proper-brand packing kit versus a budget kit costs perhaps $200 more, yet the service life differential can be 5 times longer.
Stuffbox disassembly procedure: Step 1 — depressurize and isolate upstream and downstream block valves; Step 2 — record the original number of packing rings and their installation orientation; Step 3 — remove old packing rings one at a time using a packing puller or thin screwdriver; Step 4 — clean the stuffbox bore (use a soft cloth, avoid scratching); Step 5 — inspect stem surface roughness; polish with 1000-grit sandpaper if necessary; Step 6 — install new packing rings, staggering cut ends 120 degrees apart; Step 7 — pre-load the gland to specified torque with a torque wrench.
Flange gasket selection is more complex than packing, requiring consideration of pressure, temperature, and medium: Class 150-300 carbon steel piping typically uses Spiral Wound (stainless steel winding with graphite or PTFE filler); Class 600 and above or hydrogen service uses Spiral Wound with stainless steel or nickel-based filler; LNG cryogenic flanges require specialist cryogenic gaskets from brands such as Garlock or KLINGER. I have seen standard Spiral Wound graphite-filled gaskets installed on LNG flanges — graphite becomes brittle below -50°C and will fail, making this a critical but preventable selection error.
- Packing types: PTFE V-ring (max 150°C), flexible graphite braided (max 450°C), graphite-plus-PTFE combination (mixed high-medium temperature)
- Disassembly steps: Depressurize → record ring count → remove old packing → clean bore → polish stem → install new packing → pre-load gland
- Flange gaskets: Class 150-300 use SS+graphite Spiral Wound; Class 600+ use SS+SS or nickel-based Spiral Wound
- LNG flanges: Cryogenic-rated gaskets required (Garlock/KLINGER etc.); standard SS+graphite Spiral Wound prohibited below -50°C
- Gasket storage: Protect from light and moisture; graphite-filled gaskets must avoid water contact or corrosion occurs
- Installation torque: Flange bolts must be pre-loaded in diagonal cross-pattern sequence at 3 stages (30%, 60%, 100% of target torque)
Bolt pre-load sequence is critical for flange sealing — always follow the diagonal (cross-pattern) sequence in 3 passes: first pass to 30% of target torque, second pass to 60%, third pass to 100%. Skipping directly to 100% on the first pass causes flange tilt and uneven gasket stress, appearing sealed initially but guaranteed to leak after thermal cycling. I emphasize this sequence at every pre-job briefing, yet crews still sometimes take shortcuts — it is a basic detail that separates leak-free joints from callbacks.
Daily Maintenance Tips
Regular Valve Flushing
Flush every 1 to 6 months depending on medium cleanliness — regular flushing is the most effective measure against ball valve seizure, particularly for pipelines conveying solid-laden media such as sand, scale, or rust. Flushing frequency depends on medium cleanliness: clean water lines quarterly, oily wastewater monthly, natural gas lines semi-annually. I recommend installing purge connections between the ball valve’s two flanges so flushing can be performed without removing the valve from the line.
Flushing procedure: Step 1 — confirm upstream and downstream isolation valves are closed; Step 2 — open the purge valve and slowly inject flushing medium (fresh water or diesel); Step 3 — alternately cycle the ball valve 2 to 3 times (30-degree to 60-degree increments, not fully open) so the flushing medium scrubs the seat sealing faces; Step 4 — slowly depressurize and close the purge valve. This procedure is particularly effective at preventing particle embedment in seating faces — I once found a 2 mm thick black scale deposit on the seat sealing face of a natural gas ball valve that had operated for 3 years without flushing.
Flushing liquid volume: valve cavity volume is approximately 0.5 to 1.0 times the valve nominal bore — a NPS 12 ball valve cavity is approximately 0.8 liters; flushing volume should be no less than 10 times the cavity volume (at least 8 liters) to effectively displace stagnant zones within the cavity. My standard practice is to flush until the outlet flushing liquid runs clear and free of debris, rather than flushing for a fixed time period.
- Flushing frequency: Clean water quarterly; oily wastewater monthly; natural gas semi-annually
- Purge connections: Recommended between valve flanges; eliminates need to remove valve from line
- Flushing procedure: Close isolation valves → open purge valve → inject flushing medium → cycle valve 2-3 times → depressurize and close
- Flushing volume: No less than 10 times cavity volume; NPS 12 cavity approximately 0.8 L requires minimum 8 L flushing volume
- Post-flush: Re-test sealing performance after flushing; check actuator lubricant, top up if necessary
- Prevent back-flushing: Upstream pressure during flushing should exceed downstream pressure to avoid pushing debris into downstream piping
Flushing carries risks — if the differential pressure across a ball valve exceeds 0.5 MPa during flushing, the seats absorb high-pressure impact that can damage sealing faces. I always balance pressure across the valve via a bypass valve before flushing, reducing differential pressure. During flushing, stand to the valve body side rather than directly in front — this is basic safety practice, protecting against high-pressure fluid discharge in the unlikely event of seat damage during the flushing process.
Proper Valve Lubrication
Lubricate stem every 3 months and gearbox every 6 months — ball valve lubrication covers two distinct systems: stem lubrication and actuator gearbox lubrication. Stem lubrication uses lithium-based grease or proprietary stem lubricant, performed quarterly; gearbox lubrication uses gear oil (SAE 90 or ISO VG 220), performed every 6 months or every 500 operating cycles (whichever comes first). I once encountered an actuator failure where gear oil had emulsified due to water contamination, causing worm and worm gear wear — repair cost was 20 times the price of an oil change.
Stem lubrication procedure: first, remove old lubricant and surface contaminants from the stem; then apply fresh lubricant to the stem threaded section and the exposed stem between the stuffbox and the actuator mount. Important: lubricant is applied only to the smooth stem section, never inside the stuffbox — graphite packing already contains lubricating constituents, and additional grease will be forced into the valve cavity, potentially contaminating the process medium. If rust spots appear on the stem surface, remove rust immediately and re-apply lubricant; severe rusting indicates potential corrosive medium leakage and warrants investigation.
Gearbox oil change: first drain the old oil via the drain plug; then fill with fresh oil to the center of the sight glass, never above the upper mark — overfilling causes seal extrusion and leakage, while underfilling causes gear wear. After filling, manually operate the valve through one complete open-close cycle to confirm smooth gearbox operation with no abnormal noise. My standard recommendation is to inspect seals and oil seals during every oil change — if aging is detected, replace immediately to prevent re-contamination.
- Stem lubrication: Lithium-based or proprietary stem grease, quarterly; apply only to smooth stem section, never inside stuffbox
- Gearbox oil change: SAE 90 or ISO VG 220 gear oil, every 6 months or 500 cycles
- Oil change procedure: Drain old oil; fill to sight glass center mark; never overfill as this causes seal extrusion
- Oil emulsification: Water-contaminated gear oil must be changed immediately; microbiological activity produces acidic compounds that corrode gears
- Lubrication records: Log date, oil volume, and operator in equipment records after each lubrication
- Stem rust removal: Remove rust with fine sandpaper and re-lubricate immediately; severe corrosion may indicate corrosive medium leak
Electric actuator gearboxes also require lubrication — inspect every 2000 cycles or annually, remove old lubricant and apply fresh product. I once visited a plant with abnormally high electric actuator failure rates; upon investigation, their actuators had not been opened for inspection since installation 3 years prior — the original lubricant had solidified into hard lumps, and the gears were running in a state of dry friction. This “maintenance-free” mindset is one of the greatest enemies of reliable equipment.
Periodic Pressure Tests
API 598 specifies both shell and seat tests — on-site pressure testing of ball valves is the most direct method to verify sealing integrity, and constitutes a required delivery acceptance test per API 6D and API 598. On-site testing typically does not perform a full API 598 shell test (1.5x rated pressure) but instead performs a lower-pressure sealing verification — commonly nitrogen at 1.1x working pressure or design pressure, held 30 minutes with allowable pressure drop no greater than 5%.
Test procedure: Step 1 — confirm valve is in closed position and upstream/downstream are isolated; Step 2 — connect test pump (nitrogen cylinder, pressure regulator, pressure gauge); Step 3 — slowly pressurize to test pressure at a rate not exceeding 0.1 MPa per second; Step 4 — hold for 30 minutes and record pressure readings; Step 5 — apply soap solution to all sealing points (flanges, stem, bonnet, DBB bleed port); Step 6 — depressurize to atmospheric pressure and record final pressure drop. I require test pressure gauges with accuracy of Class 1.0 or better and current calibration certificates — gauges with large errors render test results meaningless.
Ultrasonic flow detection (non-intrusive) can also assess seat sealing integrity on-line without isolating the valve: inject a small quantity of tracer gas (helium or nitrogen) into the valve cavity and use a mass spectrometer downstream to detect any gas penetration. If helium is detected downstream, the seat seal has failed; if not, sealing is intact. This method is particularly suited to large-bore ball valve online condition assessment, avoiding unnecessary disassembly and reassembly costs.
- On-site sealing test: Nitrogen hold at 1.1x working pressure, 30 minutes, allowable pressure drop 5% maximum
- Ramp rate: Do not exceed 0.1 MPa per second; rapid pressurization can cause transient impact damage to sealing faces
- Pressure gauge: Class 1.0 accuracy or better, with current calibration certificate; verify regularly to ensure test validity
- Soap solution check: Apply to all sealing points (flanges, stem, bonnet, DBB bleed port)
- Ultrasonic detection: Helium tracer + mass spectrometer for online seat integrity check; no valve isolation required
- Test interval: Recommend on-site pressure test every 3 to 5 years; test immediately if any leakage is observed
I once encountered a Class 600 ball valve that passed the hydrostatic shell test (1.5x rated pressure) during on-site testing but failed the sealing test (1.1x) with measurable seat leakage. This demonstrated that body strength was adequate but the sealing faces were already compromised — a shell test cannot substitute for a sealing test, and vice versa. Both tests must be performed independently per API 598, which specifies them as separate test programs for sound engineering reasons.
Maintenance is fundamentally about prevention, not repair. Every scheduled overhaul represents an opportunity to intervene before failure occurs. API 6D ball valves are typically rated for 20 to 30 years of service life, yet many valves in the field retire after fewer than 10 years — not because of poor valve quality but because maintenance was insufficient. Build the maintenance schedule, stock the spare parts, and train the field crew — accomplish these three things and ball valve reliability will consistently exceed industry averages.
| Maintenance Item | Interval | Key Parameter | Typical Tools |
|---|---|---|---|
| Stem lubrication | Quarterly | Stem surface rust-free, lubricant coverage complete | Brush, lithium-based grease |
| Gearbox oil change | Every 6 months / 500 cycles | Oil level at sight glass center, no emulsification | SAE 90 gear oil, drain plug |
| Valve cavity flushing | Quarterly to semi-annually | Outlet flushing liquid clear | Flushing medium, Y-strainer |
| O-ring replacement | Every 5 years (elastomers) | Hardness change within 10%, no cracks | O-ring removal tool, new spares |
| On-site sealing test | Every 3 to 5 years | Nitrogen hold 30 min, pressure drop 5% maximum | Nitrogen cylinder, pressure regulator, Class 1.0 gauge |
| ESD function test | Semi-annually | Response time 1 second or less, hold-in-place function normal | Stopwatch, multimeter |
According to FCI (Fluids Control Institute), 34% of ball valve failures stem from improper installation or maintenance rather than manufacturing defects — with packing issues accounting for 18% and seat sealing problems for 12%.
API 598 specifies seat sealing test pressure at 1.1x rated pressure, held 30 seconds — a successful shell test (1.5x) does not substitute for a seat sealing test; both are required separately.
O-rings in mineral oil above 70°C age approximately 8% per year; I recommend replacing all rubber seals every 5 years regardless of visible condition.
Keep differential pressure below 0.5 MPa during ball valve flushing — excessive pressure differential can damage seat sealing faces and turn a serviceable valve into a leaking one.

")