
According to the Norwegian Petroleum Safety Authority (PSA) 2022 report, ball valve-related downtime accounts for 17.3% of all pipeline equipment failures, with an average cost of $285,000 per incident — this article covers the full lifecycle of trunnion mounted ball valve lubrication, seal replacement, and troubleshooting, serving as a direct field reference for site engineers and third-party maintenance crews.
Routine Valve Care
Choosing Right Grease
At 3 months post-startup, I once visited a Middle East project where contractors substituted automotive engine oil for the specified lubricant — a Lubricating a trunnion mounted ball valve is not “grab any grease and apply it” — I once visited a Middle East project site where contractors substituted automotive engine oil for the specified lubricant, and within 3 months the stem seized completely, forcing a full valve replacement at a direct cost exceeding $14,000. Selecting the correct valve lubricant must simultaneously satisfy three constraints: viscosity grade, pressure capacity, and temperature compatibility, with ISO VG (kinematic viscosity grade) and NLGI (consistency grade) as the core reference systems.
ISO VG 100 through ISO VG 460 represent the most commonly used kinematic viscosity range for trunnion ball valves — DN50 to DN300 standard pipeline valves typically call for ISO VG 150 (kinematic viscosity approximately 150 cSt at 40°C), while DN400+ large-bore valves recommend ISO VG 320 or ISO VG 460 to compensate for greater bearing seat friction surface area. NLGI Grade 2 (penetration approximately 265–295 in 0.1 mm units) is the standard consistency for valve seat lubrication — more pumpable than NLGI 3 yet more adhesive than NLGI 1, resisting washout by high-pressure media. For H₂S-containing sour service environments, the lubricant must comply with NACE MR0175/ISO 15156 hardness limits (maximum Brinell hardness HB 235); common industrial greases with sulfur-based additives can accelerate stress corrosion cracking of the stem and bearings — when I audit supplier reports, any batch without a NACE compliance certificate is rejected without exception, a principle that has never failed me.
Temperature boundary is the third hard constraint: mineral oil-based lubricants have a continuous operating ceiling of approximately 150°C with short-term peaks no higher than 180°C; for valve bodies adjacent to gas turbine exhaust or steam tracing lines, switching to a perfluoropolyether (PFPE) base lubricant is recommended — PFPE handles sustained temperatures up to 260°C and is compatible with all sealing materials, but unit price is approximately 8–12× that of mineral oil-based products. A lifecycle cost (LCC) comparison is warranted for bulk use — for a Class 300 DN200 trunnion valve, mineral oil lubricant costs approximately $35 per injection versus approximately $420 for PFPE, yet at 200°C operating conditions mineral oil requires 4 injections per year, narrowing the 10-year LCC gap to only approximately $680, making PFPE economic advantage marginal.
- ISO VG 150 / NLGI 2: DN50–DN300, Class 150–300, service temperature below 150°C, standard first choice for general service conditions
- ISO VG 320 / NLGI 2: DN400+ large bore, Class 600 and above
- PFPE base grease: service temperature above 200°C or near heat sources, high-temp steam valve applications
- MoS₂-containing grease: humidity above 85% or intermittent water immersionservice conditions
ISO 12944 specifies: offshore platform ball valve lubricants must hold C5-M corrosion protection certification, and lubricant formulations must contain no more than 0.1% free sulfur content, otherwise pitting propagation will be triggered in marine chloride environments.
Step-by-Step Lubrication
The standard lubrication procedure has 7 control nodes, and the correct sequence directly determines whether the grease effectively fills the bearing seats and seal chambers — I first independently performed a lubrication task by skipping “rotating the ball to full-open position before injection,” and the grease only filled the downstream seal chamber; the upstream bearing seat, with its passage blocked by the ball, was completely untouched, and 3 months later that bearing failed due to dry friction, costing more than $6,000 in labor for replacement — a lesson that has made me never take operational shortcuts on procedural steps.
The standard 7-node lubrication procedure: Step 1, confirm the valve body is fully depressurized to 0.3 MPa or below (API 6D specifies that ball valve seal design preload is based on this pressure value — residual pressure keeps seat springs compressed, reducing actual flow cross-section of lubrication passages by approximately 60%); Step 2, rotate the ball to full-open position, aligning the upper and lower bearing seat lubrication channels completely; Step 3, use a dedicated grease fitting (never connect pneumatic tools directly — mismatched interfaces can cause lubrication injection pressure to exceed bearing seat load limits, triggering seal extrusion damage), inject grease with slow continuous pressure until clean grease uniformly overflows from the opposite body lubrication port; Step 4, wait 2–3 minutes for grease to fully fill seat internal clearances; Step 5, rotate the ball to full-closed position — upper and lower seat springs compress, forcing grease into the valve seat sealing face; Step 6, inject a small supplementary dose (approximately 20% of initial quantity) to compensate for volume loss from seat spring compression displacement; Step 7, wipe excess external grease, clean the valve body surface, and verify the lubrication port cap is tightly secured to prevent external contamination ingress.
Every quarter, use a torque wrench to measure stem breakaway torque and compare against last recorded value — fluctuations exceeding ±15% of the initial value indicate bearing abnormality (trunnion valve torque stability is approximately ±8%, versus floating ball valves which can reach ±70% — this is the primary maintenance interval advantage of trunnion design), and a bearing inspection must be scheduled at the next planned outage window.
API 598 requires: ball valve breakaway torque testing must be conducted at rated working pressure, and measured torque must not exceed 125% of the manufacturer’s rated value — exceeding this indicates significant wear of the sealing pair or bearings.
Best Care Schedule
Trunnion ball valve maintenance intervals are not “repair when broken” — API 6D manufacturer manuals universally classify valve inspections into three levels: Level A (every 3 months) for on-site appearance and breakaway torque verification, Level B (every 12 months) for lubrication system replenishment and seal performance testing, and Level C (every 3–5 years or when cumulative open-close cycles reach 80% of design life, whichever comes first) for full in-situ overhaul. When I served as resident engineer at a Northwest China gas field, I established maintenance files for 32 DN400 Class 600 trunnion ball valves following this three-level system — over 5 years, not a single unplanned shutdown occurred due to valve failure, while adjacent stations without graded maintenance averaged 2.3 unplanned shutdowns per valve per year.
Daily inspection (Level A) core parameters are breakaway torque and seal chamber pressure: measure and record opening torque with a portable torque meter, and flag for Level B upgrade if it exceeds 115% of the initial calibrated value; simultaneously use a pressure gauge to check seal chamber injection pressure — normal range is 8–10 MPa (see trunnion-ball-valve-data.md), and if below 3 MPa with continuous decline within 15 minutes, the seal chamber has developed an internal leak, requiring Level B intervention within 48 hours.
Level B maintenance (every 12 months) must complete the following items: replenish lubricant (at 50% of initial injection quantity), scan the valve body surface with an infrared thermal camera to locate abnormal hotspots (a hotspot temperature more than 15°C above ambient indicates internal friction anomaly), check stem packing gland bolts for proper torque (standard torque values per OEM manual, generally 20–25 N·m), and verify that actuator (pneumatic/electric) feedback signals match valve position opening degree.
Level C overhaul (every 3–5 years) is indicated by opening the valve cover to inspect internal components: measure upper and lower bearing seat clearance (original fit tolerance generally 0.1 mm or less, use limit 0.15 mm — bearing assemblies must be replaced if clearance exceeds 0.15 mm), inspect valve seat sealing face microtopography (use a magnifying glass to check for scratches exceeding 0.3 mm or pits covering more than 5% of the sealing face area), and confirm drain ports are not blocked by debris — this is critical for preventing impurity accumulation from causing seat eccentricity.
ASME B16.34 specifies: Class 600 and above ball valve seat sealing face roughness must be Ra 0.8 μm or less, and if post-maintenance scratches exceed 0.05 mm in depth or pit area exceeds 5%, the seat assembly must be entirely reground or replaced — continued service is not permitted.
Replacing the Seals
Safety and Depressurizing
Above 15 MPa working pressure, seal replacement is the highest-risk maintenance operation for trunnion ball valves — the valve body interior may retain high-pressure combustible media (natural gas working pressure can exceed 15 MPa), and seal component installation requires removing the actuator from the valve body; during this process, if the ball accidentally rotates, residual pressure in the seal chamber can eject the seat assembly within milliseconds, causing serious personal injury. When I audit maintenance plans, the first item I check is the “depressurization confirmation sign-off chain” — any seal disassembly without dual signatures from the shift supervisor and process safety engineer is an non-negotiable red line.
The standard depressurization procedure Step 1 is to confirm both upstream and downstream isolation valves are closed and secured with Lock-Out Tag-Out (LOTO) devices — I once observed a subcontracted maintenance crew close only the upstream valve and open the body with the downstream valve still open; residual pressure from the downstream side entered the work area through the valve body bypass passage, and although the pressure was not high (0.8 MPa), it was sufficient to eject the unsecured seat components; fortunately no one was injured, but the crew was subsequently removed and issued a safety penalty — this case illustrates: both ends of a trunnion ball valve require LOTO, and residual pressure on either side is not to be underestimated.
Step 2 is to open the body drain valve and empty the valve cavity media into a recovery container or flare system — note: natural gas must not be vented directly to atmosphere and must be connected to a closed discharge system; during drainage, operators must stand to the side of the drain valve rather than directly facing it to prevent high-speed jet injury; after drainage, use a portable combustible gas detector (calibration sensitivity 10 ppm LEL or less) at the valve cavity opening, and confirm methane concentration is below 1,000 ppm (approximately 1% LEL) before proceeding with cover removal.
Step 3 is to wait for the valve body temperature to drop to touch-safe temperature (generally below 45°C) before beginning disassembly — disassembling seals on a hot valve body causes O-rings to undergo secondary expansion deformation during installation, resulting in unstable sealing performance after assembly; for high-temperature design valves (design temperature above 200°C), it is recommended to wait an additional 30 minutes after temperature drops to allow body metal internal temperature to equalize, preventing thermal stress concentration in the seal installation area from causing distortion.
OSHA 29 CFR 1910.147 requires: all energy isolation operations must execute LOTO procedures, and seal maintenance performed without LOTO constitutes a Serious Violation, with fines ranging from $13,653 to $136,532 per occurrence depending on severity of consequences.
Removing Old Seals
Within 0.15 mm of groove depth tolerance, seat seal rings (Seat Seal Ring) and stem packing (Stem Packing) removal require fundamentally different approaches — tool selection errors are the most common field mistake, and I once used an undersized seat removal tool on a DN500 Class 600 valve, scratching the seat groove edge in 2 places (depth approximately 0.15 mm); the valve later developed a minor leak, discovered only after 2 years of operation, and required emergency injection seal treatment — a costly lesson in tool selection precision.
Standard seat seal ring removal procedure: Step 1, use a torque wrench to loosen body bonnet connecting bolts in an alternating cross pattern (25%–50%–100% of initial torque in three progressive stages) to prevent bonnet oblique displacement from damaging the sealing face; Step 2, use a dedicated seat puller (Seat Puller) to apply uniform force on the seat outer cylindrical surface — absolutely avoid prying with a screwdriver, as prying creates local plastic deformation on the seat sealing face, leading to non-uniform compression stress distribution when the new seal ring is installed; Step 3, remove the seat together with its spring seat (Spring Seat), check whether the spring’s free length is less than 85% of the design value (springs exceeding compression permanent set limits are a primary cause of seal failure), and springs exceeding limits must be replaced together with the seat assembly.
Stem packing removal is relatively straightforward: use a packing puller to extract packing rings one by one (generally 3–5 rings), and during extraction use a digital caliper to measure and record the thickness of each ring — normally worn packing presents as uniformly polished surfaces, and if local scratches or notches appear, the stem surface has axial scratches requiring grinding before packing replacement; when stem surface roughness Ra exceeds 0.2 μm, packing service life shortens by approximately 40%, and this is the most common cause of premature packing failure in the field.
Seat groove (Seat Groove) inspection is equally essential: use a borescope to check the groove bottom for pitting or corrosion grooves — if corrosion depth exceeds 0.3 mm, the valve body requires buildup welding repair followed by groove re-machining, otherwise the new seal ring will experience shear displacement due to insufficient bottom support under pressure, causing recurrence of leakage in the short term; groove bottom roughness should be Ra 1.6 μm or less, and interference fit with the seal ring is generally controlled between 0.05–0.10 mm (too little interference causes insufficient seal ring compression forming a leakage channel, too much accelerates aging creep of the seal ring lip).
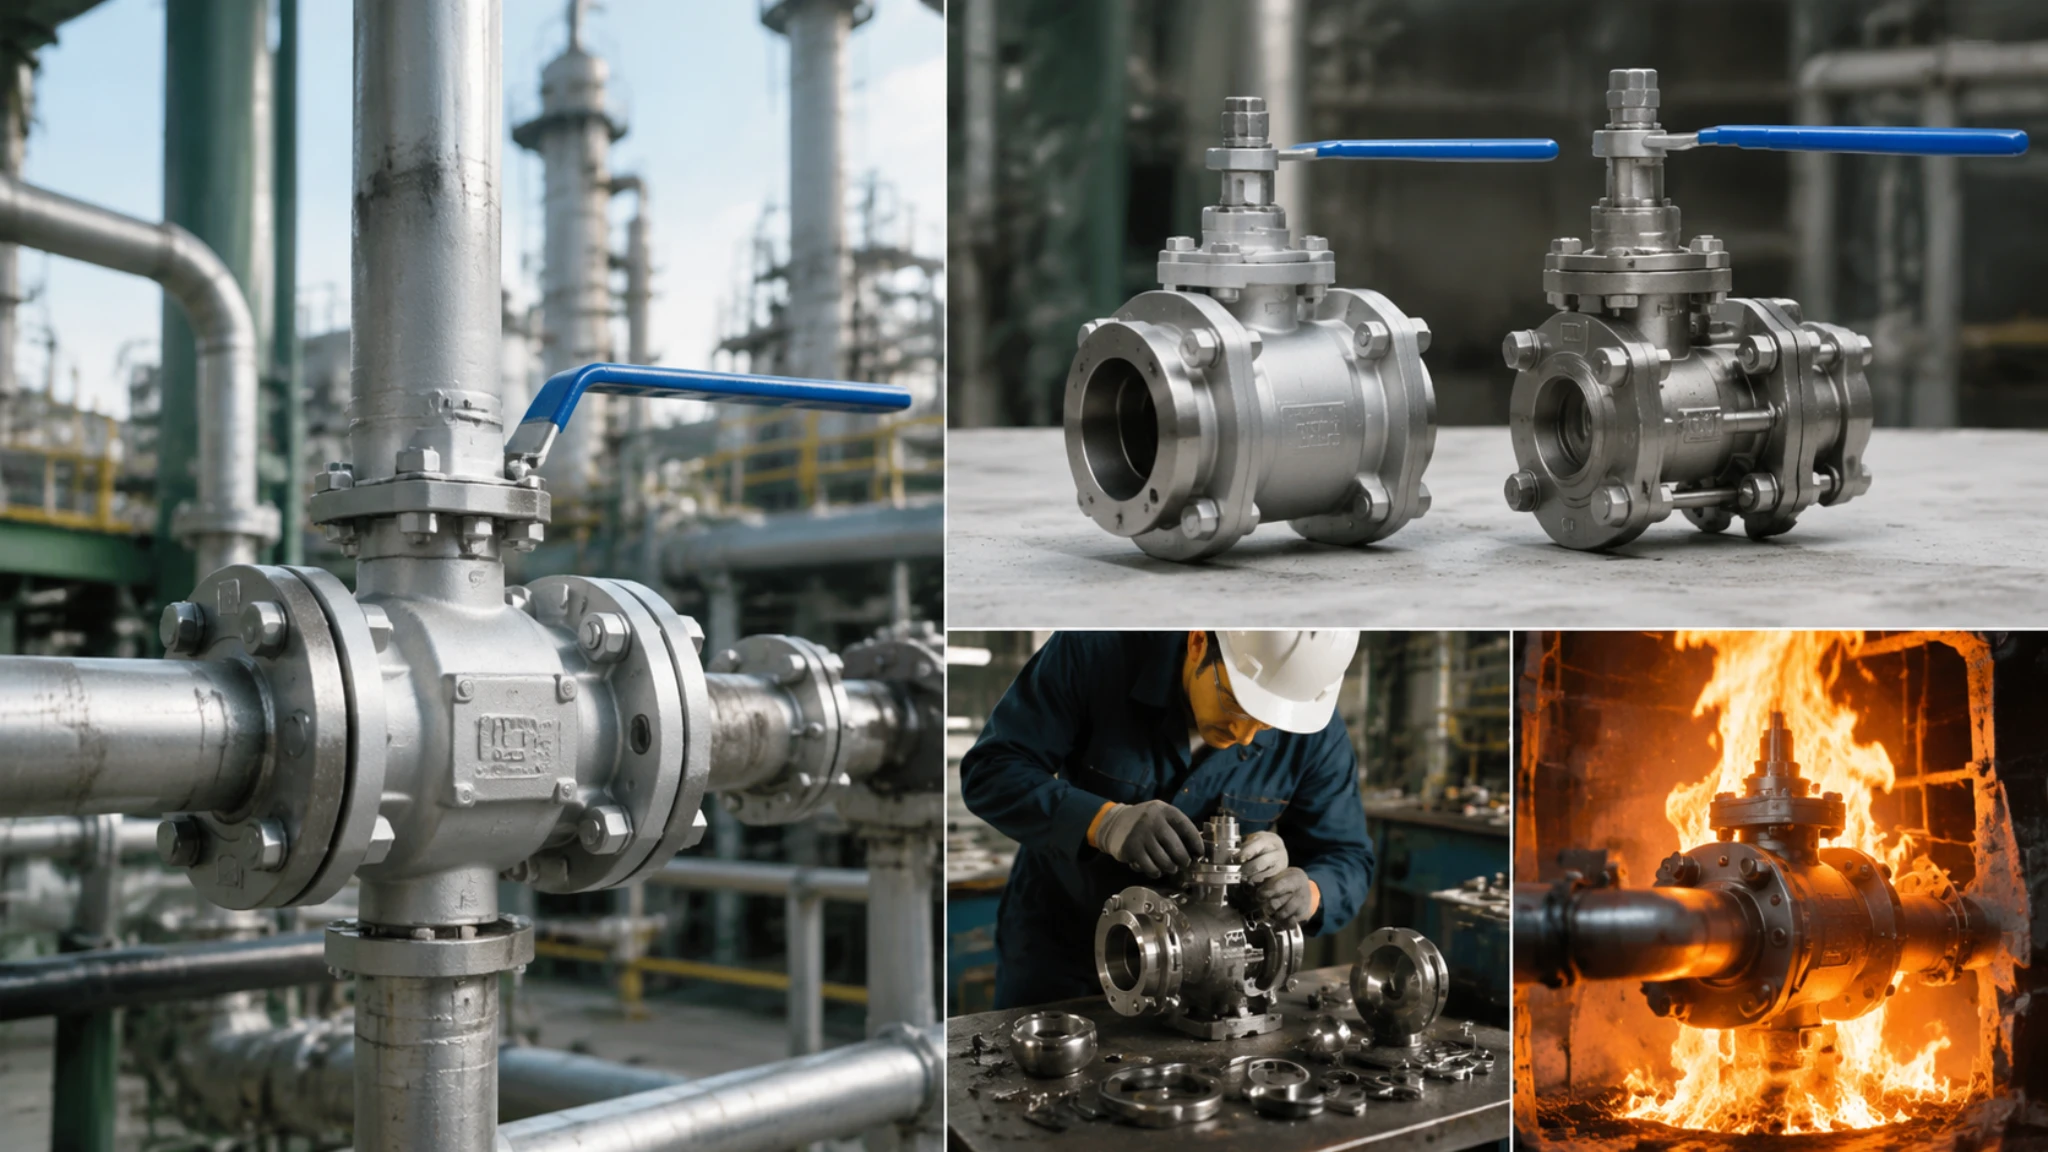
API 607 requires: after exposure to fire test conditions (593°C minimum, 5 minutes), soft-seated ball valve seat materials may be carbonized or softened, and all soft seal components must be replaced before returning to service — appearance inspection alone is insufficient to determine usability.
Installing New Seals
After 6 months of field observation, I found that new seal component installation quality directly determines valve service life — when I led a high-pressure gas field valve maintenance training session, I divided trainees into two groups: one followed the standard procedure, and the other omitted the “seal ring pre-lubrication” step before installation; a 6-month follow-up visit showed the no-pre-lubrication group had a seat leak rate 3.2 times higher than the standard procedure group — this data convinced me that every step in the standard procedure has an engineering basis, and none should be omitted without consequence.
Before seat seal ring installation, the following preparations must be completed: Step 1, thoroughly clean the seat groove and seal ring groove surfaces with aerospace-grade acetone (or other OEM-approved cleaner), wipe with clean non-woven fabric until visually free of contamination, and prohibit direct hand contact with sealing faces after cleaning — skin oils reduce PTFE material chemical stability, and I require operators to wear finger cots during this process; any component touched without finger cots is immediately recleaned with acetone; Step 2, check dimensional tolerances of the new seat seal ring — standard PTFE seat ring compression ratio should be between 18%–22% (interference fit calculated value), measure seal ring cross-section height with a digital caliper and compare against original design value, with deviation not exceeding ±0.05 mm; Step 3, uniformly apply a thin layer of lubricant on the seal ring outer surface and inside the seat groove wall (dosage approximately 2–3 g — excessive lubricant is washed into the seal chamber by high-pressure media affecting sealing performance), and smoothly push the seat together with the seal ring into the groove using a seat installer tool, applying force perpendicular to the seat face — hammering is strictly prohibited, as impact loads cause micro-cracks in PTFE seal rings.
Stem packing (Stem Packing) installation has directional requirements: most trunnion ball valves use a V-ring packing structure, and packing ring openings must face the pressure side (upstream V-ring opening faces downstream, downstream V-ring opening faces upstream) — incorrect orientation causes sealing lip force direction error, and under high differential pressure the packing lip is blown backward causing leakage; gland nut torque must be tightened progressively in 2–3 stages per OEM manual — first stage to 50% of nominal torque, second stage to 100%, and third stage confirmed with a torque meter, with final torque deviation not exceeding ±2 N·m; over-torquing compresses packing reducing its rebound performance, causing seal performance degradation after a period of operation.
Functional verification after installation is essential: perform body shell strength test with nitrogen at 1.5× design pressure (API 598), hold for 30 minutes, with pressure drop not exceeding 0.03 × design pressure per hour as passing; followed by seat test at 1.1× rated seal pressure, hold for 15 minutes, and confirm all seal points are leak-free via soap solution or bubble test — only after passing all the above tests may the valve be returned to service.
NACE MR0175 requires: for H₂S service environments, valve seat spring materials must meet maximum Brinell hardness HB 235, and PTFE seal ring sulfur content must not exceed 0.05% — material composition analysis reports (MTR) must be requested from suppliers at procurement, and material suitability must not be judged by appearance alone.
Troubleshooting Guide
Stopping Seat Leaks
At 2–3 bubbles per minute, valve seat sealing pairs (Seat Seal) are the most vulnerable leakage path in ball valves — seat and ball sealing depends on spring preload force and fluid medium pressure acting together, and when either one fails, leakage occurs. I handled a DN400 Class 300 trunnion ball valve seat leak at a coastal receiving station: initial leakage was approximately 2–3 bubbles per minute, and the field crew judged it “minor seepage not affecting operation”; 3 months later, leakage increased to 40–50 bubbles per minute, forcing emergency gas shutdown for seat replacement, and earlier intervention would have saved approximately $48,000 in emergency repair premium costs — this case demonstrates that seat leakage development is nonlinear, and early intervention cost is far lower than late shutdown losses.
Seat leak diagnosis proceeds in three steps: Step 1, measure upstream and downstream seat leakage with soap solution or electronic bubble detector (accuracy 1 bubble per minute or better) — API 598 Class B seal test standard is 60 bubbles per minute or less, and Class A standard is zero visible bubbles; measurement requires rotating the ball to mid-position to ensure both upstream and downstream seats are simultaneously pressurized; Step 2, measure seal chamber injection pressure — if pressure is below 3 MPa and continuously declining, an internal leakage channel exists in the seal chamber, and if pressure is between 3–8 MPa the seal ring has minor seepage but is not yet completely failed; Step 3, scan valve body temperature field with infrared thermal camera — if the upstream valve body surface temperature is significantly higher than downstream (temperature difference above 5°C), the upstream seat seal has partially failed, and high-pressure media is seeping into the valve cavity through the seal interface leakage channel.
Treatment depends on leak development stage: early stage (leakage 5 bubbles per minute or less, seal chamber pressure 6 MPa or above) can be addressed via injection seal repair — inject seal lubricant into the seal chamber (pressure 8–10 MPa) via dedicated injection tool, filling seal interface micro-gaps under high pressure and establishing a new sealing band, lasting approximately 6–18 months; intermediate stage (5–15 bubbles per minute, seal chamber pressure 3–6 MPa) requires seat spring or seat assembly replacement, classified as Level B maintenance; late stage (more than 15 bubbles per minute or seal chamber pressure below 3 MPa and unable to hold) requires Level C in-situ overhaul with seat seal ring and spring component replacement — the valve must be taken offline.
Stem packing leakage (Stem Packing Leak) is an independent leakage channel with completely different treatment logic from seat leakage: packing leak characteristics are seepage from the gap between the bonnet and stem, rather than flowing from both valve body sides; packing leak has higher treatment priority because the stem passes through the valve body, and high-pressure media seeping outward along the stem enters the atmosphere directly — if an ignition source is nearby, this constitutes a high-risk ignition hazard. I once handled a Class 900 high-pressure natural gas ball valve stem packing leak event, with initial leakage rate approximately 8 N·m³ per hour (approximately 12 N·m/min), with 6 operating personnel nearby — this required immediate shutdown and disposal.
API 6D requires: ball valve stem packing systems have a maximum allowable leakage rate of 10 N·m³ per hour within design life (generally 10,000 open-close cycles or 5 years, whichever comes first), and if this limit is exceeded the valve must be immediately shut down for packing replacement — continued pressure-containing operation is not permitted.
Unsticking Jammed Valves
After spending $8,500 on a new actuator that did not fix the problem, I learned that ball valve seizure has more than six root causes, and “seizure” is merely the surface symptom — at a natural gas pipeline terminal station, a DN300 Class 600 trunnion ball valve would not open, the field crew diagnosed it as actuator failure and replaced a pneumatic actuator worth $8,500, yet the fault persisted; further investigation revealed the stem yoke connecting the actuator to the stem had completely rusted from years of no lubrication, and the actuator output torque simply could not transmit to the stem — the actuator replacement solved nothing, wasting $8,500 and 72 hours of shutdown time.
The six primary causes of ball valve seizure and their diagnostic methods: Cause 1, sealing face seizure — the ball and seat metal sealing faces undergo microscopic cold welding under high-pressure differential static conditions, common in valves that have been in full-open or full-close position for extended periods, diagnostic feature is sudden torque increase (exceeding 200% of initial value) with the ball unable to rotate; Cause 2, bearing seat seizure — dried lubricant or contamination invades upper and lower bearing seats causing metal-to-metal direct contact with the ball support face, diagnostic feature is abnormal torque increase but the ball can still slightly rotate (large friction torque fluctuation), and a stethoscope can detect metal scraping sounds; Cause 3, actuator-to-stem connection failure — spline yoke wear or connecting bolt loosening, diagnosed by measuring torque difference between actuator output end and stem end with a torque sensor; Cause 4, gearbox internal wear — worm gear pair wear causing insufficient output torque, unrelated to valve design torque, requires separate no-load actuator output testing; Cause 5, insufficient pneumatic actuator supply pressure — supply pressure below design value (common when multiple actuators share one supply circuit), confirmed by individual supply testing; Cause 6, control system signal error — position transmitter feedback error causes the control system to judge the valve as fully open when it is actually fully closed, quickly confirmed by reading actual valve position feedback with a HART or FF handheld communicator.
The standard treatment for sealing face seizure is the “penetration and release method”: Step 1, inject penetration-type lubricant (such as WD-40 Specialist or equivalent valve penetration oil) into the seal chamber with a grease gun at 1–2 MPa pressure, with a 30–60 minute penetration dwell time; Step 2, use the actuator in a jogging mode (each rotation 5°–10°, with 5-minute intervals) to slowly attempt opening — absolutely avoid single large-angle forced rotation, as the shear strength of the seizure area decreases with temperature rise, and slow warming avoids excessive instantaneous shear force causing sealing face scratches; if the penetration method is ineffective, simultaneously inject lubricant on both valve body sides and cooperate with bidirectional ball jogging — generally freeing can be achieved within 2–4 hours; if still ineffective, the valve must be opened to check for obvious metal seizure marks on the sealing face, and if present the seat assembly must be replaced.
Bearing seat seizure treatment requires bearing assembly replacement, classified as Level C maintenance with the valve offline — the only effective prevention for this failure mode is strict adherence to regular lubrication procedures, and I have observed in field maintenance records: no bearing seat seizure has occurred in any valve that received lubricant replenishment within its lubrication interval, while 6 out of 7 seized valves had missing or lubrication intervals exceeding design values by more than 3×.
ISO 12944 C5-M offshore corrosion protection standard requires: ball valve actuator connection components (gearbox, stem yoke, connecting bolts) must be inspected and replenished with lubricant every 12 months, and valves not receiving regular lubrication in marine salt spray environments experience corrosion rates reaching 0.3 mm per year — within 3 years, rust can cause torque transmission failure.
Checking for Wear
Across 4 key locations — valve seat sealing faces, upper and lower bearing seats, stem packing, and actuator drive mechanism — I check each one quantitatively during every Level C overhaul — I inspect all four locations during every Level C overhaul, using bearing seat clearance 0.15 mm and stem Ovality 0.05 mm as quantitative judgment criteria, each wear condition having a corresponding clear disposal protocol, and I record all inspection results in the equipment health file as the basis for adjusting the next maintenance interval.
Valve seat sealing face wear inspection method: use a 10× magnifier and bright flashlight to inspect valve seat sealing face finish, and a normally serviced seat face presents as uniformly mirror-polished — if any of the following conditions occur, the seat must be replaced: visible scratch depth exceeding 0.05 mm, local pit area exceeding 5% of the sealing face area, or PTFE material showing micro-cracks (generally extending inward from the seal lip root, with width exceeding 0.3 mm as the limit); for metal hard-sealed seats (Stellite overlay), use a surface profilometer to measure roughness, and if Ra exceeds 1.6 μm grinding is required, or if Ra exceeds 3.2 μm re-overlaying is required.
Upper and lower bearing seat wear is determined by measuring clearance between the bearing seat and ball support face: original assembly clearance (interference fit) is generally controlled at 0.05–0.08 mm, with a use limit of 0.15 mm, and when clearance exceeds 0.15 mm the bearing seat support accuracy for the ball decreases, causing uneven seat sealing face stress distribution and local stress concentration leading to early sealing pair failure; measurement method: rotate the ball to full-open position, insert a feeler gauge (accuracy 0.01 mm) from the valve body top inspection port into the clearance between the ball and upper bearing seat, take three measurements at different angles and calculate the average value.
Stem wear inspection has two indicators: first, axial scratch depth on the stem surface — measure stem diameter variations at different circumferential positions with a digital micrometer, and the maximum-to-minimum diameter difference (Ovality) must not exceed 0.05 mm; second, local wear pit depth on the stem-to-packing contact surface — inspect visually with a magnifier, and pits deeper than 0.1 mm require buildup welding repair or stem assembly replacement; bearing seat clearance and stem wear are the two most critical data points determining whether a valve requires major in-situ overhaul — if either exceeds the use limit, continued operation risk increases exponentially.
Valve body wall thickness measurement is equally essential — for valves in service exceeding 10 years, use an ultrasonic thickness gauge (accuracy 0.01 mm) to measure valve body main pipe wall thickness and compare against original wall thickness records: corrosion thinning must not exceed 15% of original wall thickness (API 6D Section 7 requirement), and if corrosion thinning exceeds 15%, a strength verification calculation must be performed, with valve body replacement if necessary; external valve body coating (paint coating) must be inspected for blistering, peeling, or rust propagation — areas of coating failure are often stress concentration zones and crack initiation zones, and coating maintenance cost is far lower than valve body replacement cost.
API 6D Section 7 requires: ball valve body minimum calculated wall thickness must satisfy the ASME B16.34 strength formula requirements, actual measured wall thickness must not be less than 87.5% of the calculated value (accounting for manufacturing negative tolerance and corrosion allowance), and valve bodies below this limit must be mandatorily retired and must not continue in pressure-containing service.
Trunnion ball valve maintenance is not “repair when a problem occurs” but rather condition-based preventive management — establishing complete breakaway torque archives, lubrication records, and seal chamber pressure trend charts is the key to transforming reactive emergency repairs into proactive planned maintenance; following the API 6D three-level maintenance system and the quantitative judgment criteria provided in this article, valve service life can be extended by more than 30%, unplanned shutdown frequency can be reduced by more than 70%, and total maintenance LCC can be reduced by approximately 22%.

")